Quick, Cheap and Delish Pate Recipe

chicken liver pate
chicken liver pate

Chicken Liver Pate

I don’t have a story to tell, just that this is a “save money” dish, costs far less to make than to buy and takes hardly any time at all.  And, if I say so myself, it is wonderful.  This is another “Billy the Chef” (my cousin) recipe, and very lovely it is too.  The quantities below would serve 4 for a starter.

Ingredients:

  • 500g / 18 ounces of Chicken Livers, chopped
  • 2 slices of Smoked Bacon, rinds removed and chopped into small pieces
  • 4 shallots, minced
  • 2 Tbsp Brandy (any old cheap rubbish will do, for Gawd’s sake don’t break out the good stuff for this)
  • Pinch of Herbs (I used Herbes de Provence, but Thyme works very well too)
  • Squeeze or Tablespoon of Tomato Puree (this adds depth of colour and helps keep its colour in the fridge, pate has a nasty habit of going grey…)
  • 125g Unsalted Butter
  • Salt and freshly ground Black Pepper to Taste

Method:

Dry fry the chopped bacon, ie with no oil in a large frying pan.  Add in the shallots and butter and fry gently until the shallots are very soft (only 5-8 mins).  Add in the chicken livers, tomato puree, herbs, seasoning–be careful not to oversalt due to the saltiness of the bacon–along with the brandy and cook at a medium heat for about 15-20 minutes giving the odd stir.  There is real satisfaction to be had in breaking down the livers with the back of a wooden spoon, not sure why this might be…?   Leave, covered, to cool, check the seasoning before blending in a processor to a smooth but grainy texture.  Place in a dish and chill in the fridge for a couple of hours or so before serving.  It will keep, covered, for a few days.  Don’t bother faffing around with clarified butter seals, that only extends its natural fridge life for a few days and only if you do not break in there and eat it first!

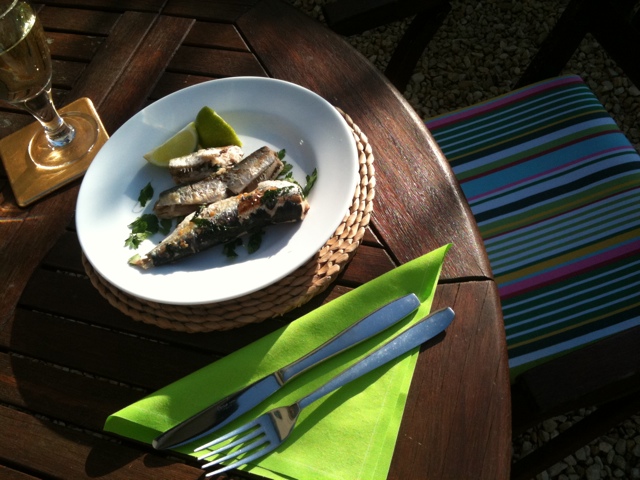
Sun on a Plate: Pan-Fried Sardines

20110408-203540.jpg
I defrosted some of last season’s sardines, rubbed with olive oil and crushed garlic, seasoned and pan-fried for about 4 mins each side, no oil in the pan. A perfect “here comes the sun” plate. Served it with flat leaf parsley & lime wedges to garnish, and an icy glass of Muscadet.

20110408-203954.jpg

Home Oven Roasted Pumpkin Seeds

Recipe: Home Oven Roasted Pumpkin Seeds

Home Roasted Pumpkin Seeds

Home Roasted Pumpkin Seeds

As I was preparing the butternut squash for my spicy soup recipe at the weekend, I wondered if the squash seeds I was about to bin could be roasted at home.  Turns out they so can, geez, who knew?  Apparently thousands of American bloggers, that’s who.  So, I started the long, sometimes painful trawl through scores of blog methods for roasting pumpkin seeds. 

Wow, are there multiple ways of doing this.  Some call for soaking for days in the fridge, changing the water, boiling in salted water first, shelling, not shelling, short roasting at high temps, long roasting at low temps, I don’t think I have ever seen such a variety of ways of making one thing.  The upshot was what I was looking for had to be quick, not hard and not fiddly, and I found this method below in a comment on another comment buried deep in a very obscure blog.  You don’t have to do the research people, because we do it for you here at Hampshirecook…

Ingredients:

  • Whatever comes out of your pumpkin/squash.  I used a butternut squash and got a couple of ounces, around 50g of seeds.
  • Olive Oil
  • Celery Salt

Method:

Heat oven to 200 degrees.  Separate the seeds from the gloopy, stringy orangey stuff by placing whatever you scooped out the pumpkin cavity in a bowl of water and whooshing around with your hand.  The seeds float away from the stringy stuff, which sinks to the bottom. This is by far the fiddliest bit, but only takes a couple of minutes.  Next, put seeds in a colander, rinse under the tap.  Then put the seeds in another bowl of clean water with a couple of teaspoons of salt in.  Leave for 10 mins.  Drain this, pat seeds dry (well dryish, I wasn’t too particular about this) with kitchen towel.

Next, in a small roasting pan, coat the seeds with olive oil and sprinkle generously with celery salt.  I probably was a bit heavy-handed with the old olive oil, I would maybe think next time a dessertspoon would be enough.  Place in oven.  Every couple of minutes, whoosh round with a spatula.  After about 15 minutes they start exploding in your oven.  They are, at that point, done.  Take out, but beware of popping pumpkin seeds and potential eye disasters…

If they make it into a bowl before you have wolfed down the lot, I will be very surprised.  Ours did not last 10 minutes, I had to grab the bowl from myself to take the photo, whereupon my hub said “Had enough of these, OK if I just finish them off?”  and promptly did.  They were absolutely gorgeous.  And we are not even very fond of the shop bought kind, it’s like, something we never buy.